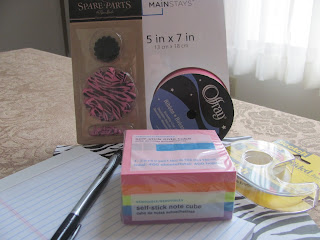
 What you need for the project really depends on what you want to make. For the Post-It holder I used a 5x7 acrylic frame, but the 4x6 work well too. And portrait or landscape will work. I found double sided tape worked well for some parts but I used a glue gun for others.
 Ultimately you will need whatever you are embellishing, adhesive, a piece of scrapbook paper (you could use scraps if you have them) and whatever embellishments you want.
At this point you should probably know this isn't going to be much of a tutorial. Most of the projects are pretty easy to figure out. Heck, if I can do them, I'm sure you can.
Post-It Holder: This part is probably the easiest. Cut your paper to fit in the frame and frame it like you would a picture. I did add a small piece of double sided tape to the back to hold the frame together. Then figure out where you want your notes and stick them on. You might need to use some hot glue to keep them from falling off. Add embellishments and you are done!
Pen-I used the Sharpie brand pens for this project because the caps don't have clips that get in the way of anything. Cut a strip of paper as long as the part of the pen you want to cover and wide enough to go around the pen probably twice. Carefully put a piece of double sided tape along the pen being careful to keep it straight. Then carefully line up the paper and start wrapping it around the pen by carefully rolling the pen. When the paper starts to overlap add another strip of tape and then another at the end to hold the edge. Did I mention that you should be careful when you do this? You want to be careful to keep everything straight so your paper lines up nice. I added a flower embellishment but you wouldn't have to.
As for the notebooks, these are seriously great and very impressive. All you do is take whatever size notebook you want (make sure it has the binding that flips over the top of the page and not just a glue binding). The ones I used were the ones that look like mini legal pads. You can get them in many colors, but I liked white. Then all you do is cut a strip of scrapbook paper the length of the notebook and wide enough to wrap around the binding. I used double sided tape to stick the paper to the notebook but a glue stick would also work. Again, I added embellishments.
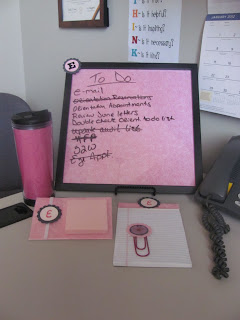
So, here is how the set turned out:

This set also included a To Do List (there will be a post about these very soon) and a travel mug. Now, it is my understanding that the travel mug wasn't supposed to be included but inspiration struck the creator during a trip to K-Mart. The giant paperclip is also very cool. Perhaps the creator will do a guest blog explaining these (hint, hint, hint). Oh! And this note holder is a 4x6 rather than a 5x7. I think I like the 4x6 better, but when I was buying the frame I couldn't remember the size I needed.
As you can see this is a very versatile project that could be customized in a lot of different ways. So, if you know someone graduating (school colors/logo theme) or starting a new job, or that is just hard to shop for, think about a desk set. After all, they are much harder to kill than that plant you are considering.
I LOVE seeing the to do list in action! I also like that I can see that "THINK" saying I pinned in the background--I need to get that hung in my own office!
ReplyDeleteI will get to work on my guest blog--I even have a photo to share!